If you can feel cold air around your front door — even when it’s fully closed — the problem is usually not the door itself.
Small gaps around the frame allow outside air to enter. These gaps cause draughts, heat loss and rising energy bills, even in modern uPVC installations.
The good news: most frame gaps are straightforward to fix.
In this guide, you’ll learn how to identify where air is coming from, the correct materials to use, and how to seal the gaps properly.
If you’re unsure whether the draught is coming from the seal instead, see How to Stop a Draught from a Front Door
Why Gaps Form Around Door Frames
Front door frames can develop gaps for several reasons:
- Poor original installation
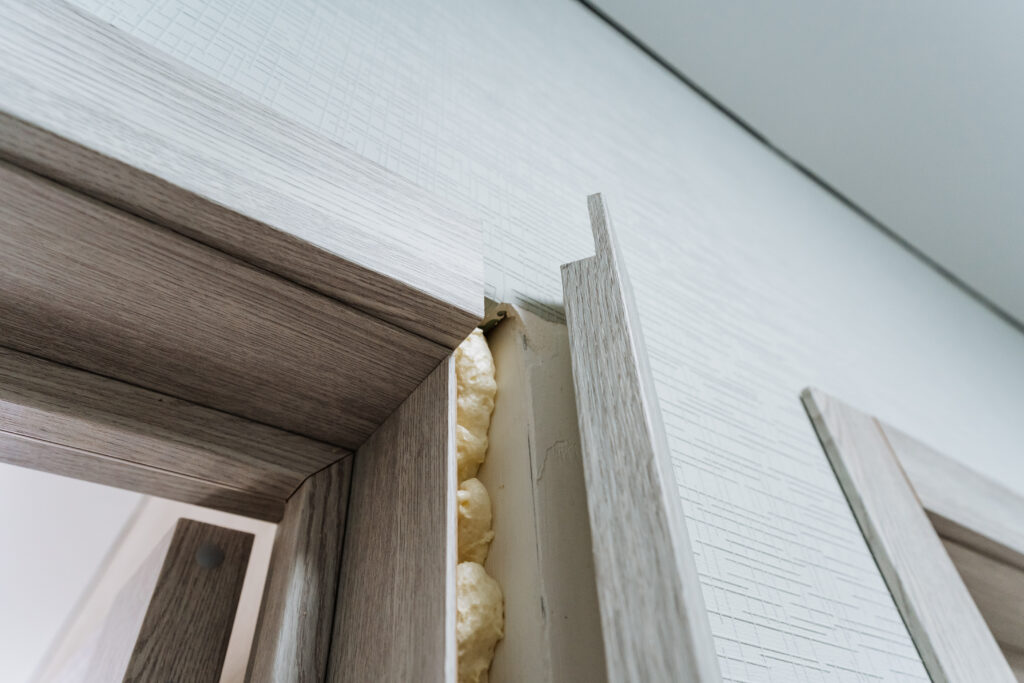
- Shrinking expanding foam behind trim
- Settlement in older properties
- Perished external sealant
- Cracked internal caulk
- Frame movement over time
There are usually two types of gaps:
- Internal gaps (between frame and plaster)
- External gaps (between frame and brickwork)
Both can allow cold air in.
Step 1 – Identify Where the Draught Is Coming From
Before sealing anything, locate the exact source.
On a windy day:
- Move your hand slowly around the frame.
- Use a lit incense stick or thin tissue to detect airflow.
- Check corners carefully.
- Inspect both inside and outside.
Common problem areas:
- Top corners
- Under the internal trim
- Between external silicone and brickwork
- Around threshold edges
If the draught is from underneath the door, see Best Draught Excluder for Front Doors
Tools and Materials Required
You may not need all of these, depending on the gap type:
- Decorator’s caulk (internal use)
- External frame sealant (weatherproof silicone)
- Expanding foam (for larger voids)
- Caulking gun
- Scraper or filling knife
- Utility knife
- Masking tape
- Cloth and cleaning spray
Use products rated for external use on outside gaps. Standard interior caulk will fail outdoors.
How to Seal Internal Gaps (Frame to Plaster)
These gaps are usually cosmetic but can allow airflow if large.
Step 1 – Remove Old Cracked Caulk
Cut away loose or split caulk using a knife.
Clean the surface thoroughly.
Step 2 – Apply Decorator’s Caulk
Run a steady bead along the gap.
Smooth with a damp finger or finishing tool.
Do not overfill — neatness matters.
Allow to dry fully before painting.
This improves both insulation and appearance.
How to Seal External Gaps (Frame to Brick)
External sealing prevents wind penetration and water ingress.
Step 1 – Remove Failed Silicone
Carefully cut away cracked or lifting sealant.
Pull out all loose material.
Clean and dry the surface completely.
Step 2 – Check for Deep Voids
If you can see a deep cavity behind the frame:
- Fill lightly with expanding foam.
- Allow it to cure fully.
- Trim flush before sealing.
Do not overfill. Expanding foam grows rapidly.
Step 3 – Apply External Frame Sealant
Use a weatherproof exterior silicone or hybrid polymer sealant.
Apply a continuous bead between frame and brick.
Smooth carefully for a watertight finish.
Ensure no gaps remain.
Sealing Around the Threshold
Cold air often enters at the bottom corners of the frame.
Check:
- External sealant line
- Joint between sill and brick
- Cracks in mortar
Reseal with external-grade sealant where needed.
If air is entering under the door leaf itself, see Best Draught Excluder for Front Doors
When the Issue Is Not the Frame
Sealing frame gaps will not fix:
- Worn rubber door gaskets
- Misaligned hinges
- Failed multi-point locking compression
- Warped door slabs
If the seal looks flattened or brittle, read Best Weatherstripping for uPVC Doors
If compression feels weak when closing, see How to Adjust uPVC Door Hinges to Stop a Draught
Common Mistakes to Avoid
- Using interior caulk outdoors
- Sealing over damp surfaces
- Ignoring deeper voids behind trim
- Overfilling with expanding foam
- Blocking drainage holes in uPVC frames
uPVC frames have drainage channels. Never seal these shut.
When to Escalate
Seek professional help if:
- The frame is visibly moving
- There are structural cracks in brickwork
- Water is entering during heavy rain
- The door was recently installed and poorly fitted
Installation faults may require frame removal and refitting.
Prevention Tips
- Inspect external sealant annually.
- Reapply silicone every 5–10 years if needed.
- Keep drainage holes clear.
- Check for cracking after cold winters.
Routine maintenance prevents larger heat-loss issues.
Quick Checklist
If sealing gaps around your front door:
- ✔ Identify exact airflow source
- ✔ Remove all failed sealant
- ✔ Fill deep voids before resealing
- ✔ Use correct interior vs exterior products
- ✔ Avoid blocking drainage channels
Related Guides
- How to Stop a Draught from a Front Door
- How to Adjust uPVC Door Hinges to Stop a Draught
- Best Weatherstripping for uPVC Doors
- Best Draught Excluder for Front Doors
Small gaps around a front door frame may seem minor.
But cold air follows the path of least resistance.
Seal those gaps properly, and you’ll improve comfort, reduce heat loss and protect your home long-term.