Introduction
Some draughts are obvious. You can feel them around the front door, near a window frame, or through a gap under an internal door. Hidden draughts are different. The room just feels colder than it should. One chair is uncomfortable to sit in. The hallway never seems to warm up. The heating is on, but something still feels off.
That usually means air is getting in somewhere you have not properly traced yet.
The good news is that most hidden draughts can be found if you inspect the house in a structured way instead of guessing. The mistake many people make is sealing the first visible gap they find and assuming the problem is solved, when the real air route is somewhere else entirely. This guide shows you how to identify hidden draughts properly, where they most commonly hide in UK homes, and how to tell whether the cold air is really entering where you think it is.
Because hidden draughts often travel before you feel them, this article includes a room-by-room draught-check system so you can track likely entry points without jumping straight to the wrong fix.
Why This Happens
A home can feel draughty even when no single gap looks dramatic.
That is because hidden draughts often come from:
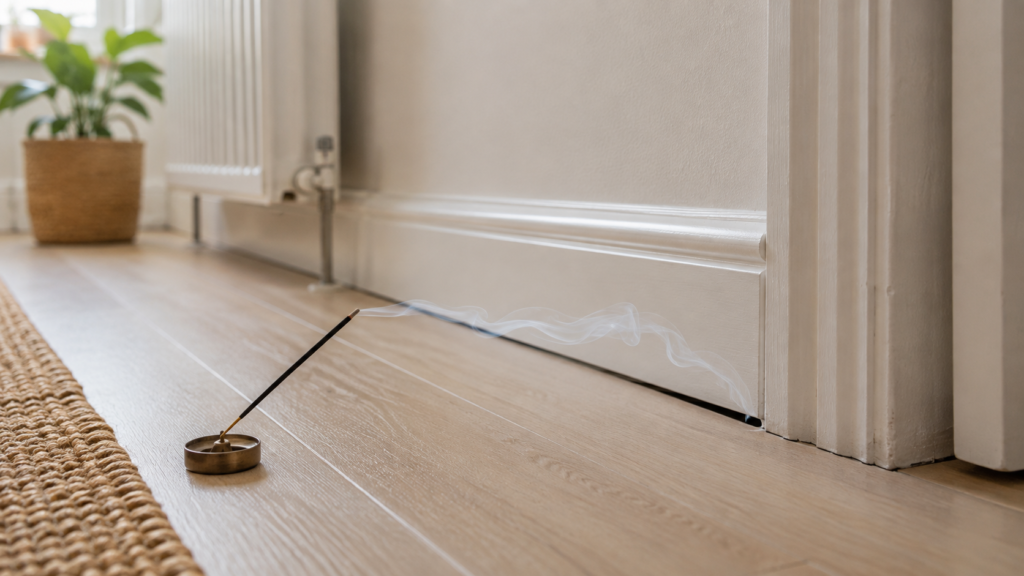
- small perimeter gaps around windows and doors
- worn seals
- frame-to-wall gaps
- floorboard gaps
- loft hatch leakage
- chimney-related airflow
- pipe penetrations or service entries
- multiple smaller leaks combining in one room
Air also moves through houses in misleading ways. A draught felt near a sofa or skirting board may not actually enter there. It may be coming from a nearby window, hallway, underfloor void or entrance door and then travelling across the room before you notice it.
That is why finding the real route matters more than finding the first cold-feeling spot.
Tools or Materials You May Need
You do not need specialist tools to make a good first diagnosis. Useful items include:
- Your hand
- Tissue or thin paper strip
- Torch
- Notebook or phone notes
- Candle or smoke source only if used very carefully and safely
- A colder or windier day for clearer testing
You are not fixing anything yet. At this stage, the goal is simply to identify where air is actually entering.
If the house already feels generally leaky and you want the wider repair plan after diagnosis, How to Stop Draughts in Your Home (UK Guide) is the main cluster hub.
Room-by-Room Draught Check System
Before testing specific gaps, work through the home like this:
| Area | What to Check First |
|---|---|
| Front door and hallway | Door frame gaps, seals, threshold, letterbox |
| Windows | Opening seals, outer frame edges, corner gaps |
| Floors | Floorboard edges, skirting lines, under-radiator areas |
| Upstairs ceilings and loft access | Loft hatch leakage |
| Fireplaces or old chimney breasts | Unused flues and chimney airflow |
| Utility or service areas | Pipe penetrations and service entry points |
This helps you move logically instead of chasing whichever room feels coldest first.
Step-by-Step Fix
Step 1: Pick the right time to check
Draught diagnosis is easiest when the outside conditions make the problem clearer.
The best times are usually:
- a colder day
- a windy day
- early morning or evening when temperature contrast is stronger
- times when the heating is on and the house should feel comfortable
A hidden draught is much harder to identify on a mild still day.
Step 2: Start with the obvious external boundaries
Do not begin in the middle of the room. Start where outside air is most likely to be entering.
Check:
- front and back doors
- window edges
- patio or external doors
- loft hatch areas
- fireplaces or chimneys
- skirting and floor edges on external walls
If your entrance area feels cold, How to Seal Gaps Around a Front Door Frame and How to Stop a Draught From a Front Door are usually two of the first targeted guides to read after diagnosis.
Step 3: Use your hand slowly, not quickly
A fast sweep with your hand often misses subtle airflow.
Move your hand slowly around:
- window opening edges
- door shut lines
- frame perimeters
- skirting board edges
- under internal doors
- loft hatch edges
You are looking for moving cold air, not just a cold surface. A wall can feel cold without actually leaking air.
Step 4: Use tissue to confirm movement
A thin strip of tissue or lightweight paper is often one of the best beginner tools because it shows movement more clearly than your hand alone.
Hold it near suspected areas such as:
- window corners
- outer frame joints
- door edges
- floorboard gaps
- skirting junctions
- loft hatch edges
If it flutters consistently, you likely have a genuine airflow route rather than just a cold surface.
Step 5: Separate “cold surface” from “cold air movement”
This is one of the biggest mistake-prevention steps in the whole process.
A cold wall or cold window surface can make a room feel uncomfortable, but that is not always the same as a draught. A draught means air is moving.
This matters because some problems need sealing, while others need:
- better insulation
- warmer room temperatures
- lower humidity
- reduced condensation
If the area feels cold but tissue does not move and air is not obviously entering, the issue may be more about cold surfaces than hidden gaps.
Step 6: Check windows properly
Windows are one of the most common hidden draught sources, but the leak can come from different places.
Check:
- the opening sash seals
- the outer frame-to-wall edge
- corner joints
- lower edges where old sealant may have failed
If the draught is around the opening edge, How to Replace Window Rubber Seals is the key repair guide. If it seems broader around the frame area, How to Stop Draughts Around Windows is the more relevant next step.
Step 7: Check doors and thresholds
A lot of hidden cold air movement starts at doors and then spreads through nearby rooms.
Pay particular attention to:
- the lock side
- hinge side
- top edge
- threshold
- frame-to-wall joins
- letterbox and nearby hardware
If the front entrance is feeding colder air into halls or stairs, that can make several rooms feel draughty even though the true source is only one area.
Step 8: Check floors and low-level air paths
Old floorboards, gaps beneath skirting, and suspended floors can create cold airflow that feels like it is coming from the wall or window.
Look especially at:
- room edges
- near radiators on external walls
- under bay windows
- downstairs corners
- hallways with timber floors
If this seems likely, How to Stop Cold Air Coming Through Floorboards becomes one of the most important follow-up fixes.
Step 9: Check loft hatches and upper-level leakage
A draughty loft hatch often makes upstairs landings or upper rooms feel colder than expected.
Test around the loft hatch edge on a cold day. Even small air leakage here can affect comfort more than people expect.
Step 10: Write down the real sources before sealing anything
Once you have tested the house, make a short list of:
- strongest confirmed draught points
- likely secondary points
- areas that feel cold but are not actually leaking
- which issue should be fixed first
This stops you wasting time sealing cosmetic cracks while the real airflow is still entering elsewhere.
When This Is Not a DIY Fix
Most draught diagnosis is very DIY-friendly, but you may need to step back if:
- the gap appears structural rather than cosmetic
- the frame is loose or moving
- there are major installation faults
- water ingress is also involved
- the issue is tied to a more serious defect rather than ordinary sealing
If the draught problem is linked with persistent window condensation or mould, Why Sealing Draughts Can Reduce Condensation is a useful next read because the relationship between cold air leakage and moisture problems is often stronger than people realise.
How to Prevent the Problem
Once you know where hidden draughts are coming from, preventing them is much easier:
- inspect seals before winter
- repair failed sealant early
- check window gaskets and door compression periodically
- keep loft hatch edges and floor gaps on your maintenance list
- tackle the strongest confirmed draughts first instead of random visible cracks
That approach is far more effective than repeatedly adding temporary fixes without proper diagnosis.
Quick Checklist Summary
- Hidden draughts are often felt away from the true entry point
- Check the home room by room rather than guessing from one cold spot
- Use your hand slowly and confirm suspected airflow with tissue
- Separate cold surfaces from actual moving air
- Check windows, doors, floors, loft hatches and service gaps in that order
- Write down the strongest confirmed draught sources before sealing anything
- Fix the real entry points first, not just the first visible crack
Related Guides
- How to Stop Draughts in Your Home (UK Guide)
- How to Seal Gaps Around a Front Door Frame
- How to Stop a Draught From a Front Door
- How to Stop Draughts Around Windows
- How to Replace Window Rubber Seals
- How to Stop Cold Air Coming Through Floorboards
- Why Sealing Draughts Can Reduce Condensation