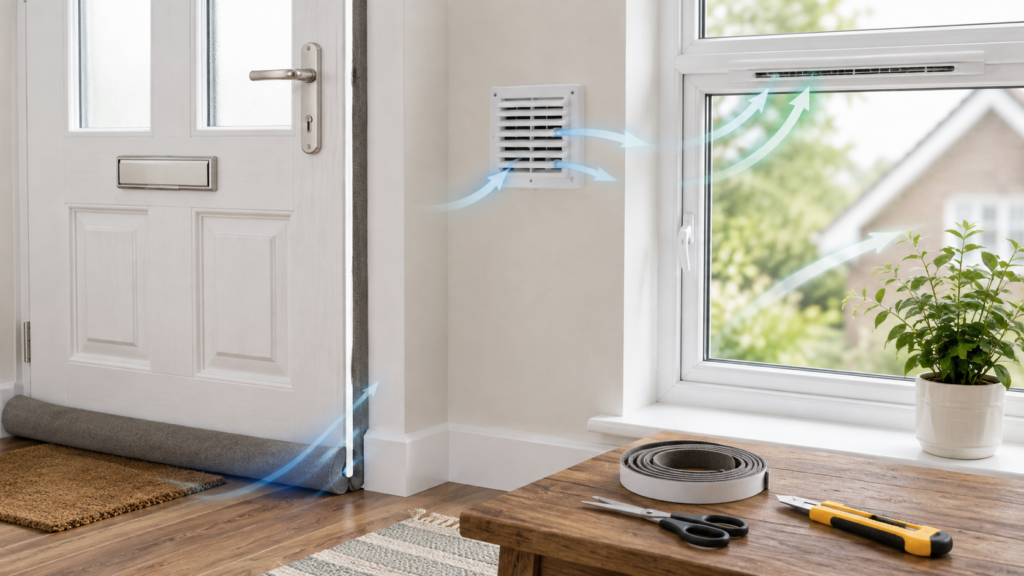
Introduction
If your home feels cold and draughty, the obvious reaction is to start sealing every gap you can find.
That sounds sensible, but it can go wrong quickly. Some gaps should absolutely be sealed because they let cold outside air in for no good reason. Others are part of how moisture leaves the house, especially in older UK homes. If you seal the wrong things, you can make condensation, mould and stale air worse while still not fixing the real draught problem properly.
That is why the real question is not just “where is the cold air coming from?” It is “which gaps are unwanted draughts, and which ones are there for ventilation or need to be managed more carefully?”
This guide explains the difference in practical terms. It shows you what should usually be sealed, what should usually be left alone, and how to avoid creating a warmer-feeling house that then develops worse moisture problems. A simple “seal or don’t seal?” checklist is included because that is the fastest way to stop guessing and making the wrong changes.
If you have not yet traced where the airflow is actually coming from, read How to Identify Hidden Draughts in Your Home first. That gives you the diagnosis step before you decide what to seal.
Why This Happens
Many homes have a mixture of:
- unwanted draughts
- normal air movement
- moisture-related ventilation needs
- poorly understood gaps that look similar but serve different purposes
An unwanted draught is cold outside air getting into the home through a gap that should not really be there. Typical examples include worn window seals, cracked frame sealant, or gaps around a front door frame.
Ventilation is different. Ventilation is the controlled or semi-controlled movement of air that helps remove moisture, stale air and indoor pollutants. In many UK homes, especially older ones, that airflow may not feel especially “designed”, but it still matters.
The confusion happens because both draughts and ventilation involve moving air. But one usually reduces comfort unnecessarily, while the other helps stop condensation and mould.
This is why some homes feel cold and damp at the same time. They may have the wrong airflow in the wrong places, and not enough useful ventilation where moisture is being created.
Tools or Materials You May Need
Before sealing anything, it helps to have:
- Tissue or thin paper strip
- Torch
- Hygrometer if condensation is also a concern
- Notebook or phone notes
- Draft-proofing materials only after diagnosis
- A colder or windier day for testing airflow
If you do confirm that the house has clear unwanted air leakage, How to Stop Draughts in Your Home (UK Guide) is the main next guide for planning the fixes in the right order.
Seal or Don’t Seal? Quick Checklist
Use this as a first filter before you block any gap.
| Area or Gap | Usually Seal? | Why |
|---|---|---|
| Gaps around front door frames | Yes | Usually unwanted outside air leakage |
| Worn window opening seals | Yes | Usually a comfort and energy-loss issue |
| Gaps around outer window frames | Yes | Usually unintended air leakage |
| Large floorboard gaps causing cold airflow | Usually yes | Often comfort loss and unnecessary leakage |
| Obvious cracks in failed sealant | Usually yes | Generally not useful ventilation |
| Trickle vents in windows | Usually no | Intended background ventilation |
| Extractor fan outlets or designed ventilation routes | No | Needed to remove moisture |
| Air bricks or underfloor ventilation openings | Usually no | Often important for building airflow and moisture control |
| Gaps caused by structural defects or damp routes | Investigate first | Need the right repair, not blind sealing |
This checklist is not a substitute for judgement, but it prevents one of the most common mistakes: sealing everything that feels cold.
Step-by-Step Fix
Step 1: Identify where the airflow is coming from
Start with diagnosis, not materials.
Check around:
- window opening edges
- outer window frames
- front and back door frames
- thresholds
- loft hatches
- floorboard edges
- skirting lines
- vents and service penetrations
You are trying to separate:
- cold outside air entering through a fault
- normal ventilation features
- internal air movement between rooms
A tissue test is often enough to show whether a gap is actually moving air or just feels cold because the surface is cold.
If you have not done this process systematically, How to Identify Hidden Draughts in Your Home should be your next step before sealing anything.
Step 2: Work out whether the airflow is helping moisture leave the home
This is the key decision point.
Ask:
- Is the gap near a bathroom, kitchen or other moisture-heavy area?
- Is there already condensation or mould in the home?
- Is the house very sealed up but still damp?
- Is the airflow linked to an obvious designed vent, air brick or trickle vent?
- Would blocking this route trap moisture rather than solve a comfort problem?
For example, sealing around a failed front door frame is usually sensible. Blocking a trickle vent because it feels cold is often not sensible if you already have condensation.
Step 3: Seal obvious unwanted draught routes first
These are usually the safest and highest-value fixes.
Typical examples include:
- failed window rubber seals
- gaps around front door frames
- poor outer frame sealant
- obvious threshold leakage
- localised cracks in trims and perimeter sealing
- floorboard gaps letting clear cold air rise
These are usually not “helpful ventilation”. They are unwanted air leakage.
Relevant next fixes often include How to Seal Gaps Around a Front Door Frame, How to Stop Draughts Around Windows, and How to Replace Window Rubber Seals depending on where the problem is.
Step 4: Leave intentional ventilation features alone unless you have a clear reason not to
This is where people often create future mould problems.
Things that should usually not be casually sealed include:
- trickle vents
- extractor fan routes
- air bricks
- underfloor ventilation points
- deliberate background ventilation features
Even if they feel a little cold, they are often doing an important moisture-control job.
If your house already suffers from wet windows, mouldy corners or damp bedroom walls, reducing ventilation blindly is much more likely to backfire.
Step 5: Improve ventilation in the right places instead of relying on random leakage
One of the best outcomes is not “seal everything and hope”. It is:
- seal the unwanted draughts
- keep or improve the useful ventilation
- control where moisture leaves the house
That usually means:
- using bathroom extraction properly
- keeping kitchen moisture under control
- using trickle vents where appropriate
- airing bedrooms and wet rooms
- avoiding indoor drying in poorly ventilated spaces
If the home feels damp as well as cold, How to Reduce Humidity in a House Naturally is an important supporting guide because comfort and moisture control need to work together.
Step 6: Be especially careful in condensation-prone homes
If you already have:
- wet windows
- black mould around frames
- bedroom wall condensation
- damp corners
- stale or stuffy air
then sealing the wrong gaps can make the problem worse, even if one room feels less draughty for a while.
That is why the sequence matters:
- identify the unwanted draughts
- protect or improve the useful ventilation
- monitor whether moisture symptoms change
This is also why Why Sealing Draughts Can Reduce Condensation is such an important companion article. Sealing the right draughts can reduce condensation. Sealing the wrong ventilation route can increase it.
When This Is Not a DIY Fix
Some situations need more than simple draft-proofing decisions.
Pause and investigate further if:
- the airflow seems to come through a structural defect
- damp or staining is present around the same area
- the gap is linked to rotting timber, loose frames or damaged masonry
- you are unsure whether the route is intended building ventilation
- condensation is severe enough that the whole house airflow balance may need a broader approach
If the question is no longer “what should I seal?” but “why is this house both damp and draughty?”, you may need to treat moisture control and draft-proofing as one joined problem rather than a series of isolated fixes.
How to Prevent the Problem
The best long-term approach is not simply making the home more airtight.
It is creating better airflow balance:
- seal the gaps that waste heat and comfort
- keep the ventilation that helps moisture escape
- improve extraction in wet rooms
- avoid relying on random leaks for “ventilation”
- review the home again after major draft-proofing changes
That is how you avoid the common pattern of fixing the cold air problem but unintentionally creating a mould problem.
Quick Checklist Summary
- Not every gap that moves air should be sealed
- Seal obvious unwanted draught routes such as failed door seals, frame gaps and worn window gaskets
- Do not casually block trickle vents, extractor routes or air bricks
- Diagnosis matters more than enthusiasm with sealant
- If the home already suffers from condensation, think about ventilation before blocking airflow
- Good draft-proofing should reduce heat loss without trapping moisture
- The goal is better-controlled airflow, not zero airflow
Related Guides
- How to Stop Draughts in Your Home (UK Guide)
- How to Identify Hidden Draughts in Your Home
- How to Seal Gaps Around a Front Door Frame
- How to Stop Draughts Around Windows
- How to Replace Window Rubber Seals
- Why Sealing Draughts Can Reduce Condensation
- How to Reduce Humidity in a House Naturally