Introduction
If your tap is dripping, turning stiffly, failing to shut off properly, or only giving poor control over the flow, the cartridge inside the tap is often the part that needs attention.
For beginners, this job can feel more intimidating than it usually is. The tap still looks fine from the outside, the part is hidden inside, and once you start searching online you quickly run into questions about quarter-turn taps, ceramic cartridges, spline counts and matching replacement kits. The good news is that most bathroom tap cartridge replacements follow a manageable process if you identify the tap type correctly, isolate the water safely, and replace the cartridge with the right match.
This guide explains how to replace a tap cartridge step by step in a beginner-friendly way, including how to recognise when the cartridge is actually the problem, how to remove it safely, and what mistakes most likely cause frustration. A quick cartridge identification section is included because buying the wrong replacement is one of the most common reasons this job stalls halfway through.
If you are not yet certain whether your dripping or stiff tap is a washer-type tap or a cartridge-type tap, How to Fix a Dripping Tap (Washer vs Cartridge) should be read first.
Why This Happens
A tap cartridge is the internal part that controls water flow and shut-off in many modern taps. In bathroom basin taps, mixer taps and quarter-turn taps, the cartridge is often the component doing the real work every time you open or close the handle.
Over time, a cartridge can fail because of:
- general wear
- internal seal deterioration
- limescale buildup
- stiff operation putting strain on internal parts
- poor-quality original components
- damage from overtightening or repeated forcing
When a cartridge starts failing, the symptoms often include:
- dripping from the tap outlet
- stiff or rough handle movement
- poor shut-off even when fully turned off
- uneven flow control
- a tap that feels loose, vague or inconsistent in use
That is why a tap that looks fine externally can still need an internal part replacement.
If you need help choosing the correct replacement once you identify the part, Best Tap Cartridges and Replacement Kits (UK) is the most relevant supporting product guide.
Tools or Materials You May Need
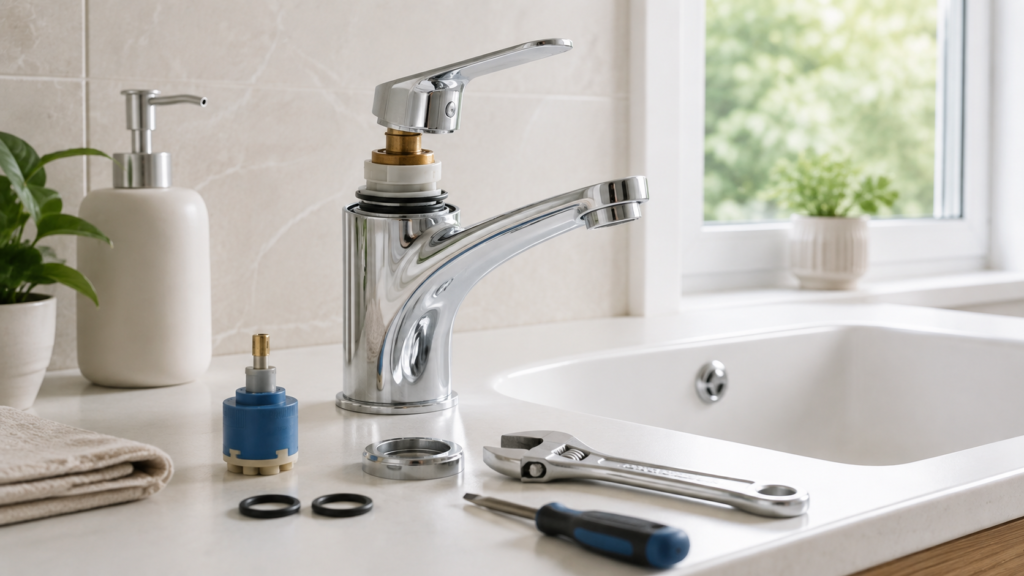
For most tap cartridge replacements, you will usually need:
- Correct replacement tap cartridge
- Flat-head or cross-head screwdriver
- Adjustable spanner
- Cloth or towel
- Small container for screws and small parts
- Optional pliers if parts are stiff
- White vinegar or limescale cleaner for light residue around components
- Soft cloth to protect chrome surfaces
If you are building a sensible bathroom repair toolkit rather than improvising with the wrong tools, Best Adjustable Spanners for Plumbing (UK) is the most useful supporting product article.
Quick Tap Cartridge Check Before You Start
Before taking the tap apart, look for these clues that point toward a cartridge-type tap:
| Sign | More Likely Cartridge Tap |
|---|---|
| Tap only turns a quarter or half turn | Yes |
| Modern basin mixer design | Yes |
| Handle feels stiff or rough rather than just loose | Yes |
| Dripping continues even when turned fully off | Yes |
| Tap does not have the feel of a traditional screw-down compression tap | Yes |
This is not only about confirming the likely fix. It also helps you avoid starting the wrong repair on a washer-based tap.
If you are still deciding between the two, go back to How to Fix a Dripping Tap (Washer vs Cartridge) before you buy parts.
Step-by-Step Fix
Step 1: Confirm the cartridge is the likely problem
Before undoing anything, check that the symptoms really point toward the cartridge and not another issue.
A cartridge is a strong suspect when:
- the tap is quarter-turn or part-turn
- the handle movement is stiff or inconsistent
- the tap drips from the outlet after being fully shut
- the hot or cold side behaves differently from how it used to
- the tap is not leaking from the trap or basin connections below
If the visible water is actually beneath the basin, around joints or from pipework below, How to Fix a Leaking Bathroom Waste Trap or How to Spot a Hidden Leak in a Bathroom may be more relevant than replacing the cartridge.
Step 2: Turn off the water supply
This is the first real job step and it matters.
If there are isolation valves under the basin, turn those off first. If not, you may need to isolate the relevant water supply more broadly.
Then open the tap and confirm that:
- the flow stops
- any remaining pressure clears
- the tap is safe to dismantle without a surprise spray or steady feed
Do not skip the check just because you think the valve is off.
Step 3: Protect the basin and work area
Place a cloth in the basin or over the plughole to stop screws, caps or small parts from disappearing. This also helps protect the finish while you work.
Keep a small container nearby for:
- decorative caps
- handle screws
- retaining parts
- any small seals or fixings removed during the process
A tidy setup makes reassembly much easier.
Step 4: Remove the tap handle carefully
Most handles have a decorative cap or marker hiding the fixing screw. Remove that first, then undo the screw and lift the handle away.
At this stage, do not force anything sharply. Bathroom taps often develop limescale or mild seizing around the handle area, especially in harder water areas.
If the handle is reluctant to move:
- wiggle gently rather than twisting aggressively
- avoid damaging the chrome finish
- work patiently rather than turning a simple repair into a broken fitting
Step 5: Expose the cartridge retaining section
Once the handle is off, you will usually find a retaining nut, shroud or securing piece covering the cartridge.
Remove any decorative cover first, then expose the cartridge mounting properly. Depending on the tap, the cartridge may be held by:
- a retaining nut
- a threaded shroud
- a securing clip arrangement on some designs
The goal here is not brute force. It is careful access.
Step 6: Remove the old cartridge
Once the retaining section is off, remove the cartridge carefully.
This is the point where beginners often discover why identification matters. Some cartridges come out easily once the retention is removed. Others need a little careful working because of light scale, but should still come free without excessive force if the right steps have been followed.
As you remove it, pay close attention to:
- the exact shape
- spindle style
- fixing pattern
- height
- locating tabs or alignment points
- hot/cold orientation if relevant
This is the information that matters when matching the replacement.
Step 7: Match the replacement cartridge properly
This is the biggest mistake-prevention step in the entire job.
Do not assume that a cartridge that looks “roughly right” is good enough. Small differences in:
- height
- spline count
- spindle design
- locating tabs
- stop positions
- hot/cold arrangement
can make the replacement unusable or unreliable.
If you have not already sourced the part confidently, use the removed cartridge to compare directly. If you need help sourcing one, Best Tap Cartridges and Replacement Kits (UK) is the best place to start.
Step 8: Clean the seating area before fitting the new cartridge
Before installing the new cartridge, wipe away any:
- loose scale
- residue
- dirt
- old buildup around the seating area
You are not rebuilding the whole tap body, just making sure the new cartridge goes into a clean, correct position.
If the area is heavily furred, a light clean can make reassembly much easier and help the new part seat properly.
Step 9: Fit the new cartridge in the correct orientation
Insert the new cartridge carefully, making sure any locating tabs or alignment points sit exactly as intended.
This is not a “close enough” step. If the cartridge is slightly out of position, the handle may sit wrongly, the tap may not shut off properly, or the cartridge may not seal as it should.
Once seated correctly, refit the retaining nut or fixing section and tighten it sensibly. Secure does not mean over-tightened.
Step 10: Reassemble the handle
Put the handle back on in the correct orientation and refit the decorative cap or cover.
Before turning the water back on, check that:
- everything sits squarely
- the handle movement feels reasonable
- no obvious part has been left loose
- the tap is not assembled off-centre
Step 11: Restore the water supply and test the tap
Reopen the isolation valves or supply and test carefully.
Check for:
- clean shut-off
- smooth handle movement
- no dripping from the outlet
- no leaks from the handle area
- no seepage around the tap body or beneath the basin
Let the tap run and shut it off several times. A successful cartridge replacement should give noticeably better control and a proper stop to the flow.
When This Is Not a DIY Fix
You may need to stop and reassess if:
- the cartridge will not come free without excessive force
- the tap body is badly corroded or damaged
- the replacement cartridge cannot be matched confidently
- the tap leaks from multiple places, not just the outlet
- the isolation valves do not work properly
- the problem turns out to be broader than the cartridge alone
In some cases, replacing the whole tap becomes more sensible than fighting a badly worn assembly.
If the repair begins turning into a wider under-basin issue, How to Spot a Hidden Leak in a Bathroom is a useful next guide before you assume the cartridge was the only problem.
How to Prevent the Problem
You cannot stop cartridges wearing forever, but you can reduce repeat issues by:
- not forcing stiff taps
- dealing with drips early
- reducing limescale where relevant
- fitting the correct replacement part rather than a near match
- buying better replacement kits where possible
A tap that is becoming stiff should not simply be ignored until it starts dripping heavily. Early repair usually gives you a cleaner, easier job.
Quick Checklist Summary
- Confirm the tap is cartridge-based before starting
- Turn off the water fully and check the tap is dead before dismantling
- Remove the handle carefully and keep small parts safe
- Take the old cartridge out gently and use it to match the replacement exactly
- Clean the seating area before fitting the new part
- Fit the new cartridge in the correct orientation
- Reassemble carefully and test for both drip-free shut-off and smooth operation
- If the tap body is badly worn or the part cannot be matched confidently, stop and reassess
Related Guides
- How to Fix Common Bathroom Plumbing Problems (UK Guide)
- How to Fix a Dripping Tap (Washer vs Cartridge)
- Best Tap Cartridges and Replacement Kits (UK)
- Best Adjustable Spanners for Plumbing (UK)
- How to Spot a Hidden Leak in a Bathroom
- How to Fix a Leaking Bathroom Waste Trap