Introduction
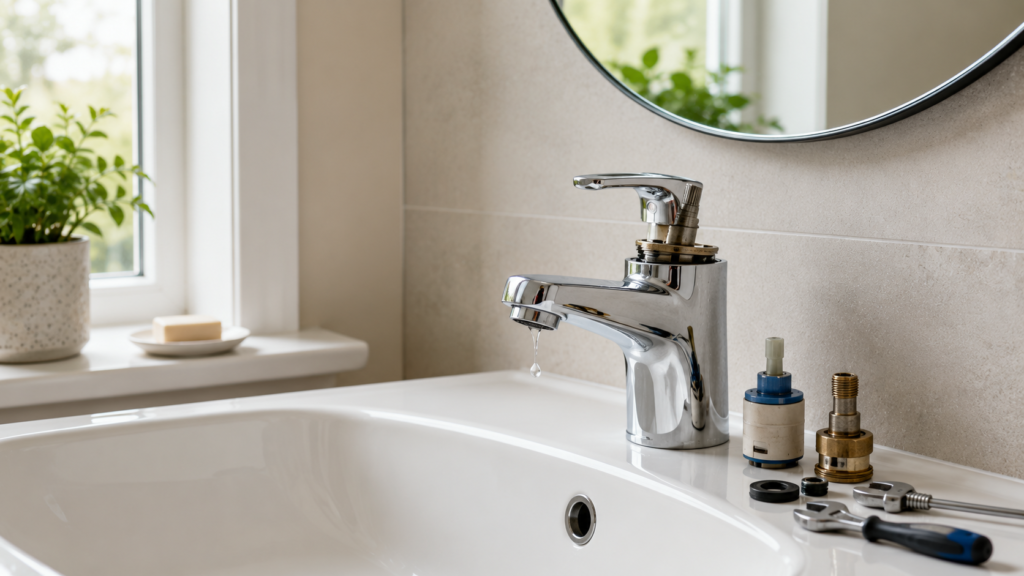
A dripping tap is one of the most common bathroom plumbing problems in UK homes, but the fix depends on one important question: is the tap using a washer or a cartridge?
That matters because the repair approach is different for each type. A traditional compression tap often drips because the washer has worn out. A more modern mixer or quarter-turn tap often drips because the ceramic cartridge inside has failed. If you assume the wrong one, you can waste time taking the tap apart, buy the wrong replacement part, or miss the real cause completely.
This guide shows you how to tell the difference, how to fix each type step by step, and what to check before buying any parts. A simple washer-vs-cartridge diagnosis section is included because this is the decision that saves the most frustration for beginners.
If the bathroom has wider plumbing issues beyond one tap, How to Fix Common Bathroom Plumbing Problems (UK Guide) is the main cluster hub to use alongside this guide.
Why This Happens
A tap drips because water is no longer being shut off cleanly inside the tap body.
On most domestic bathroom taps, that usually happens for one of two reasons:
Worn washer
On older-style compression taps, turning the handle winds a washer down onto a valve seat to stop the flow. Over time, that rubber washer wears out, hardens or distorts, and the tap starts dripping even when fully closed.
Worn cartridge
On many modern taps, especially quarter-turn and mixer types, a cartridge controls the water flow. As the cartridge wears, becomes damaged or gets affected by limescale, the tap may drip, become stiff, or stop shutting off properly.
That is why one dripping tap can need a very cheap washer, while another needs an entirely different internal part.
If you are looking for replacement components after diagnosing the fault, Best Tap Cartridges and Replacement Kits (UK) is the most relevant product guide in this cluster.
Tools or Materials You May Need
What you need depends on the tap type, but commonly useful items include:
- Adjustable spanner
- Screwdriver
- Cloth
- Replacement washer or cartridge
- PTFE tape only if appropriate for a related threaded fitting, not as a cure-all
- Small container for screws and parts
- Soft cloth to protect chrome surfaces
For general under-sink and tap repair work, Best Adjustable Spanners for Plumbing (UK) is the most useful tool guide to keep alongside this job.
Washer vs Cartridge – Quick Diagnosis
Before you take the tap apart, use this quick guide.
| Sign | More Likely Washer Tap | More Likely Cartridge Tap |
|---|---|---|
| Handle turns several full turns to open | Yes | Less likely |
| Handle only turns about a quarter or half turn | Less likely | Yes |
| Traditional separate hot and cold tap style | Often | Sometimes |
| Modern mixer tap | Less likely | Often |
| Drip plus stiff or rough quarter-turn action | Less likely | Yes |
| Older tap with screw-down feel | Yes | Less likely |
This is not foolproof, but it is usually enough to stop you buying the wrong first part.
Step-by-Step Fix
Step 1: Identify the tap type before taking it apart
This is the most important first step.
Look at how the tap operates:
- If it keeps turning several times before fully opening, it is more likely to use a washer.
- If it turns only a quarter or half turn, it is more likely to use a ceramic cartridge.
- If it is a modern mixer tap, cartridge failure is often more likely than a washer.
Do not skip this step. It often decides whether the repair is very simple or slightly more involved.
Step 2: Turn off the water supply
Before dismantling anything, isolate the tap properly.
If there are isolation valves under the basin, turn those off first. If there are not, you may need to shut off the relevant water supply more broadly.
Then turn the tap on to confirm the flow has stopped and pressure has reduced.
Step 3: Protect the area and remove the tap handle
Place a cloth in the basin or around the work area so small parts do not disappear down the plughole or mark the surface.
Then remove the decorative cap if present and undo the fixing screw.
Lift the handle off carefully. If it is stuck, do not force it violently. Older bathroom taps can seize slightly through limescale and age.
Step 4: Inspect the internal mechanism
Once the handle is off, the repair path becomes clearer.
If it is a washer tap
You will usually remove the headgear assembly and find a rubber washer at the lower end. Look for:
- worn edges
- distortion
- hardening
- obvious flattening
If the washer is damaged, replacement is usually the correct next step.
If it is a cartridge tap
You will normally expose a ceramic cartridge or similar internal unit. Look for:
- signs of wear
- stiffness
- limescale buildup
- cracked or damaged components
A cartridge usually needs replacing rather than “repairing”.
Step 5: Replace the faulty part
Replacing a washer
Remove the old washer and fit the new one correctly. Check that the size and type match. It is also worth looking at the valve seat condition. A new washer fitted against a rough or damaged seat may not last as well as expected.
Replacing a cartridge
Remove the old cartridge carefully and match it exactly. This is where many people go wrong, because cartridges vary. You need the correct type, not one that merely looks roughly similar.
If you have reached this stage and need buying help, Best Tap Cartridges and Replacement Kits (UK) is the key supporting guide.
Step 6: Reassemble the tap carefully
Put the tap back together in reverse order, taking care not to overtighten decorative or chrome-finished parts.
A tap repair often fails not because the part replacement was wrong, but because the reassembly is rushed, cross-threaded or over-tightened.
Step 7: Turn the water back on and test properly
Once reassembled:
- reopen the isolation valves
- run the tap gently
- check that it shuts off cleanly
- look for new leaks around the handle or body
- confirm the original dripping has stopped
If the tap still drips after replacing the part, check whether:
- the wrong part was used
- the seat or internal body is damaged
- the cartridge was not seated correctly
- the tap is worn enough that a larger replacement job is more sensible
When This Is Not a DIY Fix
You may need to stop and reassess if:
- the tap body is badly worn or corroded
- the internal parts are seized and will not come free safely
- the tap leaks from multiple places, not just the outlet
- the wrong cartridge type cannot be identified confidently
- isolating the supply is not straightforward
- the basin pipework or fittings start leaking when disturbed
If the issue extends below the basin and connections begin dripping too, How to Fix a Leaking Bathroom Waste Trap and How to Spot a Hidden Leak in a Bathroom may become relevant parts of the wider diagnosis.
How to Prevent the Problem
You cannot stop every tap from wearing out eventually, but you can reduce repeat issues by:
- not overtightening the tap when closing
- dealing with drips early before internal wear gets worse
- replacing the correct part rather than forcing a temporary fix
- reducing limescale buildup where relevant
- buying better replacement parts where possible
If the repair becomes uneconomical or the internals are generally worn, replacing the tap may make more sense than repeated part changes.
Quick Checklist Summary
- First identify whether the tap uses a washer or a cartridge
- Multi-turn taps are often washer-based; quarter-turn taps are often cartridge-based
- Turn off the water before dismantling
- Remove the handle carefully and inspect the internal mechanism
- Replace the correct worn part rather than guessing
- Reassemble carefully and test for both drips and new leaks
- If the tap still drips, check whether the wrong part was used or whether the tap body itself is worn
Related Guides
- How to Fix Common Bathroom Plumbing Problems (UK Guide)
- Best Tap Cartridges and Replacement Kits (UK)
- Best Adjustable Spanners for Plumbing (UK)
- How to Spot a Hidden Leak in a Bathroom
- How to Fix a Leaking Bathroom Waste Trap