Introduction
Black mould around a uPVC window frame is usually a sign that moisture is repeatedly settling on or around the window rather than a sign that the uPVC itself is failing.
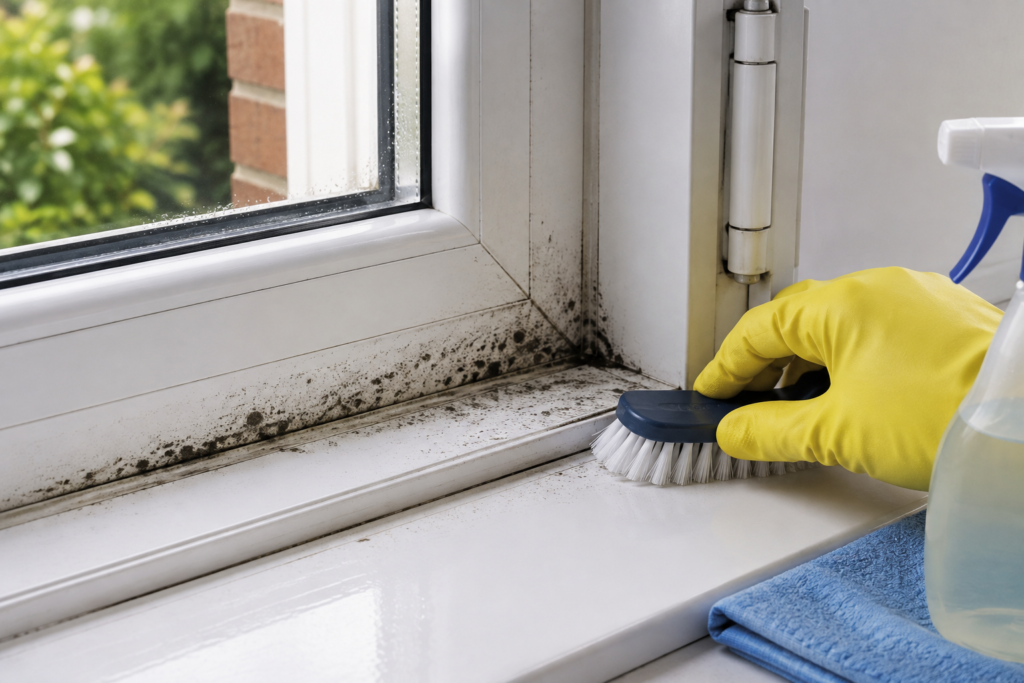
The mould often appears first in the corners of the frame, along the rubber seals, around the lower edge of the glass, or where the frame meets the plaster. Those areas stay colder than the rest of the room, so condensation collects there easily. Add dust and repeated dampness, and mould has exactly the conditions it needs to grow.
The immediate job is to remove the mould safely without damaging the uPVC, seals or surrounding decoration. The more important job is then to stop the area becoming damp again. If you only clean the visible mould, it can return within weeks.
This guide explains how to remove mould from uPVC window frames properly, which areas need extra care, and how to reduce the condensation that usually causes it. If your windows regularly run with water in the morning, the wider moisture problem is covered in How to Stop Condensation on Windows, the main FixItSimple guide for this topic.
Why This Happens
Mould does not grow on a clean, dry uPVC frame simply because the frame is plastic. It grows because moisture is repeatedly present on the surface.
The most common cause is condensation.
Warm indoor air contains water vapour. When that air reaches colder glass, rubber seals and uPVC frame sections, the surface temperature can be low enough for some of the water vapour to condense into droplets.
This is particularly common:
- overnight in bedrooms
- during colder months
- around poorly ventilated windows
- where curtains or blinds restrict airflow
- behind furniture close to the window
- in rooms where clothes are dried indoors
- where humidity from bathrooms or kitchens spreads through the house
If you regularly wake to wet glass, Why Do My Windows Get Condensation Every Morning? explains why overnight moisture is such a common trigger.
Mould then develops where the moisture stays longest. The lower corners and gasket lines are particularly vulnerable because water can collect there rather than evaporating quickly.
What if only one section of the window is mouldy?
A small localised patch can still be condensation, but inspect it rather than assuming.
Look for:
- failed sealant
- water staining on the plaster
- dampness that remains even in dry weather
- obvious water entry around the window
- damage around the frame-to-wall junction
If the area stays persistently wet rather than becoming damp mainly during condensation periods, use How to Tell If Mould Is Caused by Condensation or a Leak before treating it as a simple window mould problem.
Tools or Materials You May Need
For a typical uPVC window mould-cleaning job, useful items include:
- rubber or nitrile gloves
- disposable cloths or washable microfibre cloths
- soft toothbrush or small soft-bristled brush
- suitable mould remover
- clean warm water
- paper towels or dry cloths
- small container or spray bottle if required by the cleaner
- old towel to protect the sill or floor
For stubborn mould around the frame and seals, Best Mould Remover Spray for Window Frames (UK) covers the most suitable product types and what to look for before buying.
Avoid very abrasive pads, metal scrapers and aggressive scouring products. uPVC is durable, but its surface can still be scratched or dulled.
Step-by-Step Fix
Step 1: Ventilate the room before you start
Open a window elsewhere in the room if practical, or create some airflow before using a mould-cleaning product.
Follow the instructions on the cleaner carefully, particularly around ventilation, contact time and protective equipment.
Do not mix cleaning products. In particular, never combine bleach-based products with other household cleaners.
Step 2: Protect the surrounding area
Mould remover can affect paint, fabrics, blinds and some decorative finishes.
Move curtains or blinds out of the way and protect:
- painted window boards
- timber trims
- nearby fabrics
- flooring immediately beneath the window
A towel or absorbent cloth beneath the working area will also catch dirty runoff.
Step 3: Remove loose surface moisture first
If the window is currently covered in condensation, wipe away the excess water before applying cleaner.
Pay particular attention to:
- the bottom frame rail
- corners
- drainage channels
- rubber seals
- the joint where the frame meets the sill
Cleaning onto a heavily wet surface can dilute some products and makes it harder to see exactly where the mould remains.
Step 4: Apply the mould remover according to its instructions
Apply the chosen product to the affected areas without soaking the whole window unnecessarily.
Target the mould on:
- uPVC surfaces
- corners
- frame grooves
- accessible seal areas
Allow the product the stated contact time rather than immediately wiping it away. The cleaner needs time to work.
Step 5: Clean the corners and grooves carefully
Flat frame surfaces are usually easy. The harder part is mould trapped in narrow corners and textured areas.
Use a soft toothbrush or small brush to work gently around:
- gasket edges
- frame corners
- handle-side recesses
- drainage areas
- small joints
Do not scrub aggressively. The aim is to remove the growth, not score the plastic or damage the rubber.
Step 6: Treat the rubber seals gently
Window seals can become stained by mould, particularly if moisture has been present for a long time.
Clean them carefully using a product suitable for the material and do not pull, stretch or scrape them unnecessarily.
If the rubber has become:
- cracked
- brittle
- badly shrunken
- permanently flattened
cleaning may not be enough. A worn seal can also contribute to colder surfaces and draughts. In that case, How to Replace Window Rubber Seals is the more useful next repair.
Step 7: Wipe away residue
Once the cleaner has completed its required contact time, wipe the area according to the manufacturer’s directions.
Use clean cloths and make sure residue is not left sitting in frame channels or on adjacent surfaces.
Repeat the treatment if necessary rather than trying to remove a heavy mould patch through aggressive scrubbing.
Step 8: Dry the frame thoroughly
This step is easy to underestimate.
Once the mould is removed, dry:
- frame corners
- gasket lines
- the lower sill
- drainage recesses
- the edge where the glass meets the frame
Leaving the area wet immediately recreates the conditions you are trying to eliminate.
Step 9: Check whether staining remains
Sometimes the mould is removed but darker staining remains, particularly on older rubber seals or sealant.
That does not always mean live mould is still present.
If the affected material is badly stained, degraded or no longer sealing properly, replacement may be more sensible than endless cleaning.
Step 10: Fix the condensation problem that caused it
This is the step that determines whether the mould stays away.
Check whether you regularly have:
- wet windows in the morning
- high bedroom humidity
- closed trickle vents
- laundry drying indoors
- curtains pressed tightly against the window
- poor bathroom extraction
- rooms that become very cold overnight
If several apply, cleaning alone will not prevent recurrence.
How to Reduce Humidity in a House Naturally explains the most effective everyday ways to reduce the moisture load without relying immediately on equipment.
Where humidity remains high despite sensible ventilation and moisture control, Best Dehumidifier for Condensation in UK Homes is the relevant product guide for deciding whether active moisture removal is worthwhile.
When This Is Not a DIY Fix
Most surface mould on uPVC frames is manageable, but the problem deserves further investigation if:
- mould returns very rapidly after proper cleaning
- plaster around the window remains permanently damp
- paint is blistering or peeling around one localised area
- water appears after rainfall rather than mainly during cold mornings
- the frame itself seems loose
- there are large gaps between the frame and wall
- mould has spread deeply into adjacent plaster or timber finishes
Those symptoms can indicate a leak, installation defect or a more significant damp problem rather than ordinary surface condensation.
If you are struggling to determine which, When Is Mould a Structural Problem? explains the signs that justify moving beyond normal cleaning and humidity control.
How to Prevent the Problem
Once the frame is clean, focus on keeping it dry for longer.
Remove morning condensation
If water regularly collects on the glass, wipe or vacuum it away rather than allowing it to pool on the lower frame.
Improve airflow around the window
Avoid keeping heavy curtains or blinds tightly against the glass for long periods if condensation is already a problem.
Use existing ventilation
Keep trickle vents open where appropriate and use bathroom and kitchen extraction consistently.
Reduce indoor moisture
Drying large amounts of washing indoors, long showers without extraction and keeping multiple rooms completely shut can all increase humidity.
Keep the room reasonably warm
Very cold surfaces are more likely to reach the temperature at which condensation forms.
Deal with worn seals and gaps
A badly deteriorated seal or cold draught around the opening can make local surfaces colder. The relationship between air leakage and surface moisture is covered in Why Sealing Draughts Can Reduce Condensation.
Quick Checklist Summary
- Remove excess condensation before cleaning the frame.
- Use a suitable mould remover and follow its instructions.
- Clean corners and rubber-seal edges with a soft brush.
- Avoid abrasive pads and aggressive scraping on uPVC.
- Dry the frame thoroughly after treatment.
- Check whether stained rubber is actually damaged and needs replacing.
- Reduce humidity and morning condensation to stop the mould returning.
- Investigate persistent local dampness that does not behave like normal condensation.
Related Guides
- How to Stop Condensation on Windows
- Why Do My Windows Get Condensation Every Morning?
- How to Tell If Mould Is Caused by Condensation or a Leak
- How to Reduce Humidity in a House Naturally
- Best Mould Remover Spray for Window Frames (UK)
- Best Dehumidifier for Condensation in UK Homes
- Why Sealing Draughts Can Reduce Condensation