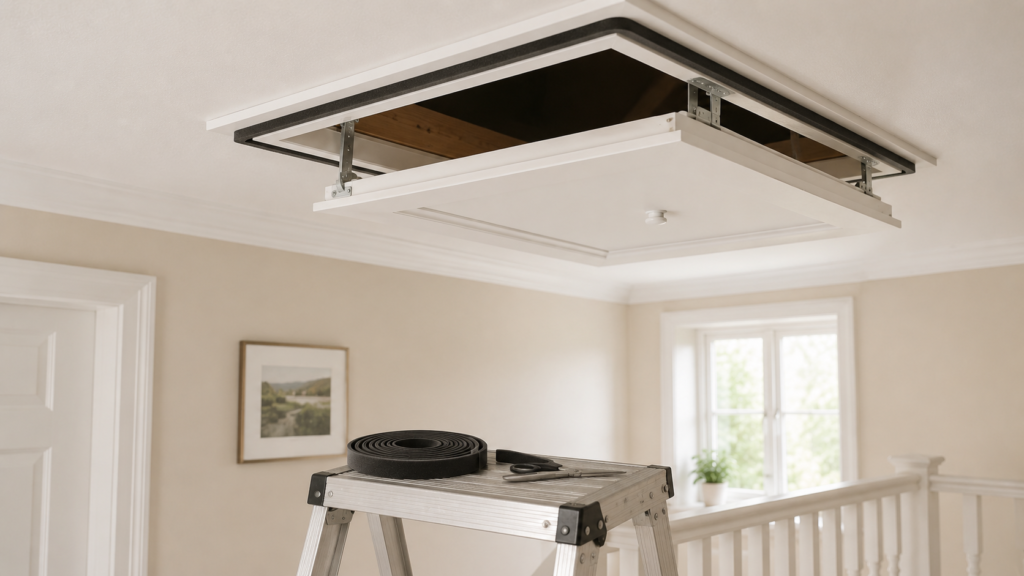
Introduction
A draughty loft hatch can make the landing or upstairs rooms feel colder than the rest of the house, even when the heating is on and the windows appear fine.
This is one of the most overlooked heat-loss points in UK homes. Because the loft space above is usually much colder than the living area below, even a small gap around the hatch can let cold air drop into the house and warm air drift upward. That can leave the landing uncomfortable, create a cold patch near the ceiling, and make upstairs rooms feel harder to keep warm.
The good news is that loft hatch draught-proofing is often a manageable DIY job if the hatch itself is in reasonable condition. The key is to work out whether the problem is around the hatch edge, the hatch panel, or the way it closes. This guide explains how to diagnose the airflow properly, choose the right type of seal, and improve the hatch without making it awkward or unsafe to use.
Because loft hatch problems are often partly about fit and partly about sealing, this guide includes a quick hatch-check section before the repair steps so you can tell whether you need simple draft-proofing or a slightly more involved adjustment.
Why This Happens
A loft hatch becomes draughty for a few common reasons:
- there is no proper seal around the hatch edge
- an old seal has flattened, shrunk or fallen away
- the hatch does not sit flush when closed
- the panel is slightly warped or lightweight
- the frame gaps are inconsistent
- warm air from the house is moving upward and pulling colder loft air down around the edges
In many homes, the loft hatch was never sealed especially well in the first place. Older hatches often rely on little more than the panel resting against the frame, which means even a small amount of movement or unevenness can leave a clear air path.
This matters not only for comfort but also for moisture control. Warm moist indoor air rising into the loft through gaps can contribute to loft condensation issues too, which is another reason this is worth fixing properly rather than ignoring.
If the landing feels cold for several reasons rather than one obvious hatch gap, How to Identify Hidden Draughts in Your Home is the best wider diagnosis guide to use alongside this one.
Tools or Materials You May Need
Depending on the hatch type, you may need:
- Self-adhesive foam or rubber draft-proofing strip
- Measuring tape
- Cloth and mild cleaner
- Scissors or sharp knife
- Torch
- Screwdriver if catches or fittings need light adjustment
- Replacement hatch catch or latch if the hatch is not pulling closed properly
If the draft-proofing needs a deeper or more structured fix around the frame rather than only a light seal, Best Expanding Foam for Door and Window Gaps can be useful for appropriate hidden voids around the opening, though that is not the first fix for most hatches.
Quick Loft Hatch Check Before You Start
Before fitting any seal, check the hatch properly.
| Sign | What It Suggests |
|---|---|
| You can feel airflow all around the edge | Missing or poor seal is likely |
| The hatch rocks slightly in the frame | Fit or closing pressure is part of the issue |
| Only one side feels draughty | Uneven frame contact or warped hatch |
| The hatch does not pull down tightly | Catch or latch may need adjustment |
| The hatch sits visibly uneven | Seal alone may not fully solve it |
This quick check matters because some loft hatches need better closure as much as better sealing.
Step-by-Step Fix
Step 1: Confirm the loft hatch is the draught source
Before adding materials, check whether the airflow is really around the hatch.
On a colder day, slowly move your hand around:
- the hatch perimeter
- the hinge side
- the latch side
- the corners
- the frame edge against the ceiling
You can also use a thin strip of tissue to detect air movement more clearly.
If the air seems to be coming from cracks in the ceiling around the hatch frame rather than between the hatch and frame itself, the sealing approach may need to go slightly wider than just adding a gasket strip.
If several upper-level air leaks are present, How to Stop Draughts in Your Home (UK Guide) is the best cluster hub for planning which ones to prioritise first.
Step 2: Clean the hatch edge and frame
Any draft-proofing strip needs a clean surface to bond properly.
Wipe down:
- the hatch edge
- the contact face of the frame
- any dusty corners
- old adhesive residue if previous seals were fitted badly
This is one of the easiest steps to rush, and one of the most common reasons new seal strips fail early.
Step 3: Decide where the seal should go
In most cases, the draft-proofing strip works best when placed where the hatch closes against the frame and compresses slightly when shut.
The goal is to create an air seal without making the hatch difficult to close. That means:
- the strip must contact evenly
- it should not be so thick that the hatch sits proud
- it should not interfere with hinges or catches
For many loft hatches, a medium-density self-adhesive foam strip is enough. You are not trying to pad the hatch heavily. You are trying to stop the air path.
Step 4: Apply the seal neatly and continuously
Run the seal around the relevant contact edge as evenly as possible.
Take care at:
- corners
- the latch side
- places where the hatch fit is already slightly tight
- spots where previous paint or filler has created an uneven surface
A continuous seal is more effective than several awkward offcuts with gaps between them.
Step 5: Close the hatch and test the compression
Once the strip is fitted, close the loft hatch and check:
- does it shut properly?
- does it sit flush?
- does the latch still engage?
- does the seal compress all around, or only in parts?
- has the airflow reduced?
If the hatch now feels too tight or will not sit correctly, the seal may be too thick or applied in the wrong position.
Step 6: Adjust the catch or closure if needed
Some loft hatches have only minimal closing pressure. If the hatch does not pull firmly into the seal, even a decent strip may not work properly.
In that case, a small adjustment to the catch, latch or closure point may help the hatch seat more evenly. This is often enough to turn a partial fix into a proper one.
Step 7: Check for frame gaps around the opening
If the hatch edge now seals better but the area still feels draughty, check the frame-to-ceiling junction.
Some loft hatch problems come not just from the hatch panel, but from:
- poorly sealed frame edges
- gaps between the hatch surround and ceiling opening
- cold loft air moving through surrounding voids
That kind of gap may need a different approach from the hatch seal itself.
Step 8: Re-test on a cold day
The true test is not whether the hatch looks better. It is whether the airflow has dropped and the landing feels less cold.
Recheck for:
- tissue movement
- obvious cold air at the corners
- a cold patch directly beneath the hatch
- whether the upstairs space feels more even in temperature
This tells you whether the issue was mainly the seal, mainly the fit, or partly the surrounding frame.
When This Is Not a DIY Fix
You may need to go further than simple draft-proofing if:
- the hatch is badly warped
- the frame is poorly fitted or loose
- the loft opening has larger surrounding gaps
- the hatch has no practical way to close tightly against a seal
- the cold air issue is part of a wider loft or ceiling defect
In those cases, sealing strips may help, but they may not be the full answer.
If the upstairs still feels cold after fixing the hatch, How to Stop Cold Air Coming Through Floorboards and How to Fix Gaps Under Internal Doors may also be relevant because upper-floor comfort problems often involve more than one air path.
How to Prevent the Problem
To keep the loft hatch from becoming draughty again:
- inspect the seal before winter
- replace flattened or damaged strips early
- keep the hatch closing squarely
- do not overload the hatch with thick strip that distorts its fit
- check surrounding frame joints if the hatch area feels cold again
A loft hatch is a small opening, but because it sits under a cold loft void, even modest air leakage there can have a noticeable effect on comfort.
Quick Checklist Summary
- Confirm the loft hatch is genuinely the draught source before fitting materials
- Clean the hatch and frame before applying any seal
- Fit a continuous seal where the hatch closes against the frame
- Make sure the hatch still closes properly after sealing
- Adjust the latch if the hatch is not pulling into the seal well enough
- Check surrounding frame gaps if the hatch itself now seals but the area still feels cold
- Retest on a colder day to confirm the draught has actually reduced
Related Guides
- How to Stop Draughts in Your Home (UK Guide)
- How to Identify Hidden Draughts in Your Home
- How to Stop Cold Air Coming Through Floorboards
- How to Fix Gaps Under Internal Doors
- Best Expanding Foam for Door and Window Gaps
- Why Sealing Draughts Can Reduce Condensation