Introduction
If your uPVC door feels draughty around the edges, lets in cold air even when it looks fully closed, or has rubber seals that look flattened, brittle or shrunken, replacing the door seal is often the right fix.
This is one of the most useful front-door repairs for comfort and heat retention, but it is also one of the jobs people get wrong by rushing the diagnosis. Some draughts are caused by worn seals. Others are caused by a door that no longer compresses the seal properly because it has shifted slightly on the hinges. Others come from the outer frame rather than the seal itself. That is why the job goes best when you first confirm the air is actually coming through the door’s shut line and not somewhere else around it.
This guide explains how to replace a uPVC door seal properly, how to identify the correct replacement profile, and what to check before you pull the old gasket out. A quick seal diagnosis section is included first because it is the step that stops most wasted purchases.
If you have not yet confirmed where the cold air is actually entering, How to Stop a Draught From a Front Door is the best first guide to read alongside this one.
Why This Happens
uPVC doors are designed to seal against rubber gaskets fitted into grooves around the door or frame. Over time, those seals can stop doing their job properly because they become:
- flattened through repeated compression
- brittle from age and exposure
- shrunken at corners
- split or cracked
- loose in sections
- less able to spring back when the door opens and closes
When that happens, the door can still latch and lock, but cold air starts getting through the shut line. The hallway feels colder, nearby rooms lose heat more easily, and the seal may no longer make proper contact all the way around.
A failing seal is especially likely if the draught is strongest around the side or top edge of the door rather than just underneath it.
If the draught improves when you pull the door inward by hand, the seal may not be the only issue. In that situation, How to Adjust uPVC Door Hinges to Stop a Draught is the key related guide because alignment may be affecting seal compression.
Tools or Materials You May Need
For most uPVC door seal replacements, you will need:
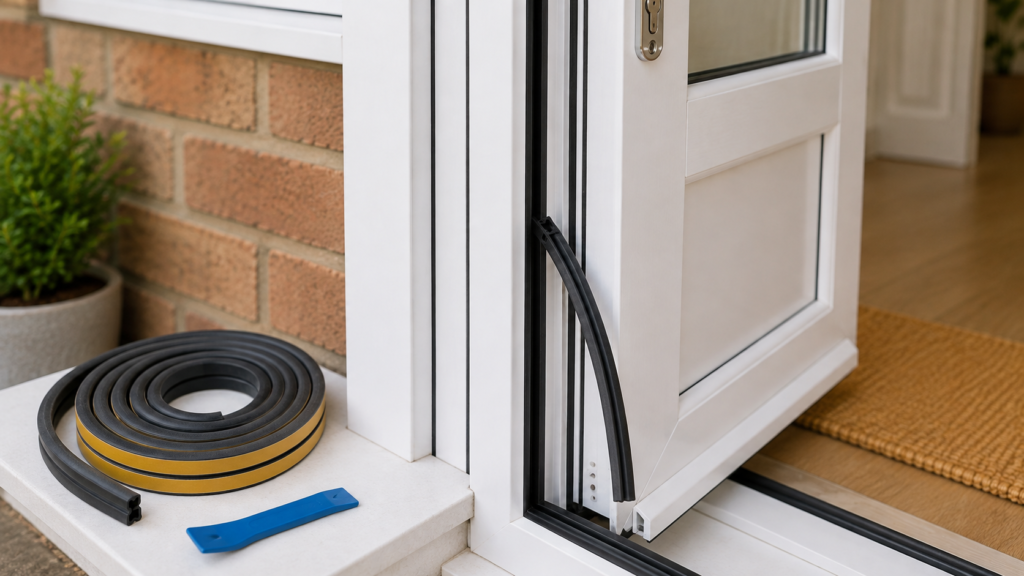
- Correct replacement uPVC door seal
- Scissors or sharp knife
- Cloth
- Mild cleaner
- Tape measure
- Sample of the old seal for profile matching
- Optional blunt tool for guiding the seal neatly into awkward corners
If you still need to choose the right replacement product, Best Weatherstripping for uPVC Doors is the most useful supporting guide before you buy anything.
Check the Seal Before You Replace It
Before you start pulling the seal out, check whether the gasket is actually the problem.
Signs the seal is likely worn
- visible cracking or splitting
- flattened shape
- hard or brittle texture
- shrinkage at corners
- the door edge feels draughty even when closed firmly
- the seal no longer looks evenly seated in the groove
Signs the issue may be more than just the seal
- the door seals better when pulled inward
- one side is noticeably looser than the other
- the door does not sit evenly in the frame
- the air feels strongest around the outer frame, not the shut line
- the bottom edge is the only problem
If the problem seems more like a bottom-edge gap than a side or top seal issue, Best Draught Excluder for Front Doors is more relevant. If the issue is clearly around the frame-to-wall edge, How to Seal Gaps Around a Front Door Frame should come before replacing the door gasket.
Step-by-Step Fix
Step 1: Confirm the draught is around the shut line
Use your hand or a strip of tissue on a colder day to check where the air is actually coming in.
Move slowly around:
- the lock side
- the hinge side
- the top edge
- the upper corners
- the lower side edges
If the airflow is strongest where the door closes against the frame, a seal replacement is much more likely to help. If the air is around the outer edge of the frame instead, replacing the gasket will not solve the real problem.
Step 2: Remove a short sample of the old seal first
Do not pull the entire gasket out straight away.
Instead, remove a short section from a discreet area so you can inspect:
- the profile shape
- the push-in foot
- the thickness
- the general style of the seal
This one step prevents one of the most common mistakes in the whole job: ordering a replacement that looks vaguely right online but does not actually match the original fit.
Step 3: Match the replacement seal properly
uPVC door seals vary more than many people expect. You need to match:
- the profile
- the way it pushes into the groove
- the overall size
- the style of compression
Do not rely on “universal” wording unless you can compare it sensibly to the original sample.
If you are still choosing between options at this point, Best Weatherstripping for uPVC Doors is the right product guide to use.
Step 4: Pull the old seal out fully
Once you have the correct replacement ready, remove the old seal steadily all the way around.
Look for:
- shrinkage at corners
- brittle or broken sections
- dirt in the groove
- areas where the seal was previously stretched or fitted badly
This gives you useful confirmation that the original gasket really had deteriorated.
Step 5: Clean the groove thoroughly
Before fitting the new seal, wipe out the groove with a cloth and mild cleaner.
Remove:
- dust
- bits of old rubber
- grime
- debris that could stop the new gasket seating cleanly
A clean groove makes it much easier to get a neat fit and more consistent seal all the way around.
Step 6: Fit the new seal without stretching it
Start at a sensible point and press the new gasket into the groove gradually.
The most important rule here is: do not stretch the seal as you fit it.
If you stretch it during installation, it may shrink back later and create gaps at corners or joins. Instead:
- press it in gently and evenly
- let it sit naturally
- guide it into the groove rather than pulling it tight
- take your time at corners
This is one of the biggest differences between a seal replacement that lasts and one that quickly develops new draught gaps.
Step 7: Cut neatly and finish the corners carefully
When you reach the end, cut the gasket neatly so it sits snugly without bunching or tension.
Pay special attention to:
- corners
- the join point
- places where the groove is slightly tighter
- any area that previously showed shrinkage
Poor corner fitting is one of the easiest ways for a new gasket to underperform even when the rest of the job looks tidy.
Step 8: Close the door and test the new compression
Once the seal is installed, close the door and check:
- does it shut properly?
- does it feel slightly more snug against the frame?
- has the draught reduced?
- does the seal make more even contact?
- is the handle still easy enough to operate?
A good seal should improve compression without making the door absurdly hard to close.
Step 9: Reassess if the draught remains in one area
If the new seal improves most of the door but one edge still leaks, the issue may not be the gasket alone.
Common reasons include:
- the door is slightly out of alignment
- the hinges need adjustment
- the frame is leaking instead
- the threshold is contributing to the cold airflow
If the door seals better overall but still feels loose on one edge, How to Adjust uPVC Door Hinges to Stop a Draught is the most logical next step.
When This Is Not a DIY Fix
You may need to go beyond seal replacement if:
- the door is badly out of alignment
- the hinges are worn or damaged
- the frame itself is leaking
- the threshold is the real issue
- the seal groove is damaged
- the door still does not compress properly after a correct gasket replacement
In those cases, the new gasket may help, but it may not be the full fix.
If the hallway remains cold after the seal replacement, How to Stop Cold Air Coming Through Floorboards can also be relevant because entrance discomfort often comes from more than one air route.
How to Prevent the Problem
To help the new seal last:
- clean the door edges occasionally
- check the gasket before winter
- avoid forcing the door against poor alignment
- replace worn sections early rather than waiting until the whole seal fails
- deal with hinge or compression issues before they crush the gasket unevenly
A good uPVC seal replacement should noticeably improve comfort, but it works best when the door itself is also sitting correctly in the frame.
Quick Checklist Summary
- Confirm the draught is around the shut line before replacing the seal
- Remove a short sample of the old gasket first
- Match the replacement profile properly
- Clean the groove before fitting the new seal
- Press the seal in evenly without stretching it
- Take extra care at corners and the final cut
- Test the door after fitting to confirm better compression and less airflow
- If the door still leaks on one edge, check alignment and hinge compression next
Related Guides
- How to Stop Draughts in Your Home (UK Guide)
- How to Stop a Draught From a Front Door
- How to Adjust uPVC Door Hinges to Stop a Draught
- How to Seal Gaps Around a Front Door Frame
- Best Weatherstripping for uPVC Doors
- Best Draught Excluder for Front Doors
- How to Stop Cold Air Coming Through Floorboards