Introduction
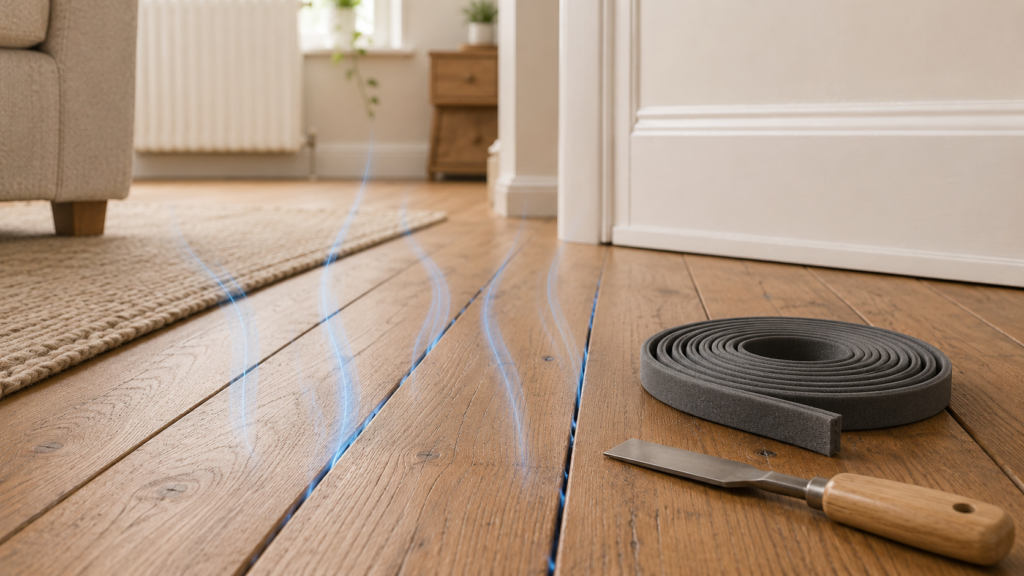
If parts of your floor feel noticeably colder than the rest of the room, or you can feel moving air around skirting lines, under furniture, or between boards, cold air coming through floorboards is often the reason.
This is especially common in older UK homes with suspended timber floors, where there is a ventilated void below the boards. That underfloor ventilation is important for the building, but gaps between the boards and around the floor edges can let too much cold air into the living space above. The result is a room that never feels fully comfortable, even when the heating is on.
The key is to reduce the unwanted indoor draught without blocking the building ventilation that protects the floor structure underneath. This guide explains how to identify the real floor-level air routes, what can be sealed safely, and which draft-proofing methods are most useful. A quick “floor draught or something else?” section is included because floor-level cold air is often mistaken for a door or window problem.
If you have not yet traced the airflow properly, How to Identify Hidden Draughts in Your Home should be read first.
Why This Happens
Cold air usually comes through floorboards for one or more of these reasons:
- gaps between older floorboards
- gaps where boards meet skirting
- openings around pipe penetrations
- general air movement from a ventilated subfloor void
- shrinkage in timber over time
- local movement or imperfect previous repairs
Suspended timber floors are common in older homes, and they are meant to have ventilation below. The issue is not that underfloor ventilation exists. The issue is that cold air from below is finding too easy a path into the room itself.
This is why the room can feel cold at ankle level even if:
- the windows seem fine
- the heating works
- the walls are not obviously draughty
- the ceiling and upper part of the room feel warmer
If the room also suffers from external-wall cold spots or door leakage, the discomfort may be a combination of several air routes rather than the floor alone.
Tools or Materials You May Need
Depending on the floor and size of gaps, you may need:
- Torch
- Tissue or thin paper strip
- Flexible floorboard draft-proofing filler or system
- Decorator’s caulk for suitable perimeter joints
- Scissors or knife
- Cloth and vacuum
- Filler knife or applicator depending on product choice
If you are deciding between gap-filling methods or materials, Best Expanding Foam for Door and Window Gaps may help for deeper hidden voids in specific surrounding areas, though it is not the default product for visible floorboard gaps themselves.
Is It Really the Floor?
Before sealing anything, check whether the cold air is truly coming through the boards.
| Symptom | What It Suggests |
|---|---|
| Cold air strongest at skirting edges or between boards | Floorboard draught is likely |
| Tissue moves at floor level but not near windows | Floor route is more likely |
| The room feels cold mainly at ankle height | Typical floor-level airflow pattern |
| Air movement is strongest near an external wall or radiator pipe | Perimeter or penetration gap is likely |
| The whole room is cold with no obvious floor movement | Could be general insulation or wider draught issue |
This matters because some “floor draughts” are actually coming from nearby door frames, thresholds or wall gaps.
Step-by-Step Fix
Step 1: Find the strongest floor-level air route
On a colder day, slowly test:
- between floorboards
- along skirting edges
- around radiator pipes
- near bay windows
- at the edges of external walls
- around hearths or former chimney areas if relevant
A tissue strip is especially useful here because it shows air movement more clearly than your hand.
If the strongest airflow is not at the boards themselves but under a nearby internal door, How to Fix Gaps Under Internal Doors may actually be the better first repair.
Step 2: Separate board gaps from perimeter gaps
This is one of the most useful diagnosis steps.
A room may have:
- narrow board-to-board gaps
- a larger gap where the floor meets the skirting
- a localised hole around pipework
- a combination of all three
Each may need a slightly different approach. Do not assume one filler method suits every floor gap.
Step 3: Clean the gaps before sealing
Vacuum or clean out dust, grit and loose debris from the area you are treating.
This helps the seal or draft-proofing product sit better and last longer. It also makes it easier to judge the real size of the gap rather than working over a layer of dirt.
Step 4: Seal the appropriate visible gaps between boards
For ordinary draughty board gaps, use a floor-suitable draft-proofing approach that can cope with small movement and daily use.
The aim is to stop cold air rising into the room while still leaving the underfloor space itself properly ventilated from below where intended.
This is the crucial distinction: you are sealing the room side of the unnecessary air route, not blocking the building’s underfloor ventilation system from outside.
Step 5: Deal with skirting-edge gaps carefully
If the strongest air is at the perimeter rather than between the boards, treat the floor-to-skirting gap appropriately.
This is often one of the biggest hidden cold-air routes in older rooms.
For many homes, this step makes just as much difference as the board gaps themselves.
Step 6: Seal around pipe penetrations
Cold air often leaks around radiator pipes and other floor penetrations where there is a visible ring or gap.
These are high-value fixes because:
- they are often very localised
- the airflow can be surprisingly strong
- they are commonly missed during general decorating
Step 7: Recheck the room after sealing
Once the most obvious floor-level gaps are treated, test the room again.
Check for:
- ankle-level cold air
- tissue movement in previously affected spots
- whether the room heats more evenly
- whether the draught has shifted to another nearby source you had not noticed before
It is very common to notice the next-biggest leak only after the worst one is reduced.
When This Is Not a DIY Fix
Floorboard draft-proofing may not fully solve the problem if:
- the floor structure has bigger defects
- boards are damaged or very loose
- the cold air is mainly entering through nearby wall, window or door issues
- there are larger subfloor problems or signs of damp beneath
- the room suffers from broader heat-loss issues rather than simple floor gaps
If floor-level airflow remains strong after sealing obvious gaps, the next likely companion checks are How to Draught-Proof a Loft Hatch, How to Seal Gaps Around a Front Door Frame, and How to Stop Draughts Around Windows, depending on the rest of the house layout.
How to Prevent the Problem
To reduce repeat floor draught issues:
- inspect gaps before colder months
- deal with pipe-entry gaps early
- keep perimeter floor joints on your maintenance list
- avoid treating the symptom as “just an old house thing” if the draught is obvious and uncomfortable
- review the wider room once the biggest gap is fixed
This is particularly useful in older homes where several modest leaks combine into one room that never feels quite warm enough.
Quick Checklist Summary
- Confirm the cold air is really coming through the floor, not from a nearby door or wall
- Test between boards, around skirting edges and at pipe penetrations
- Clean gaps before applying draft-proofing
- Seal visible room-side air routes without blocking intended underfloor ventilation
- Treat perimeter gaps and pipe entries as seriously as board gaps
- Re-test the room after sealing to check whether the airflow has genuinely reduced
Related Guides
- How to Stop Draughts in Your Home (UK Guide)
- How to Identify Hidden Draughts in Your Home
- How to Fix Gaps Under Internal Doors
- How to Draught-Proof a Loft Hatch
- How to Seal Gaps Around a Front Door Frame
- Why Sealing Draughts Can Reduce Condensation